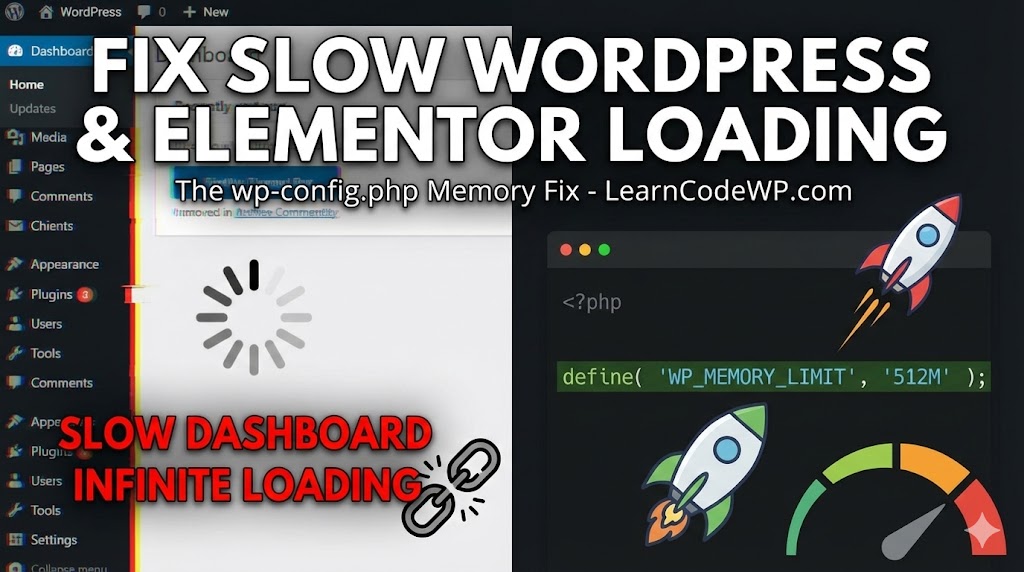
If you are seeing the dreaded Elementor “infinite loading” animation—the gray logo that pulses forever—you are not alone. This is one of the most common issues WordPress users face when building their sites.
Often, you might see a small popup in the corner asking if you want to enable “Safe Mode.” While Safe Mode is a good temporary test, it doesn’t solve the root cause. In 90% of cases, this issue is caused by one specific thing: Server Resource Limits.
In this tutorial, we will show you exactly how to fix the Elementor loading loop by safely increasing your WordPress memory limit.
Why Is This Happening?
Elementor is a powerful page builder, and it requires a fair amount of “fuel” (server memory) to run its editor. By default, many WordPress installations are capped at 40MB or 64MB of memory. Elementor requires at least 128MB to function, and recommends 256MB or more for smooth performance.
When the editor tries to load and hits that 64MB ceiling, it “chokes” and gets stuck in an infinite loop.
The Solution: Edit wp-config.php
The most reliable way to fix this is to force WordPress to allocate more memory. We will do this by adding a single line of code to your wp-config.php file.
Warning: Before editing any core files, always make sure you have a backup of your website.
Step 1: Access Your File Manager
Log into your web hosting control panel (cPanel, Plesk, or your managed host’s dashboard) and look for File Manager.
Alternatively, you can use an FTP client like FileZilla.
Step 2: Locate the Config File
Navigate to your public_html folder (or the root folder where your WordPress site is installed). Look for the file named: wp-config.php
Step 3: Add the Memory Limit Code
Right-click the file and select Edit.
Scroll down through the code. You are looking for a line near the bottom that says: /* That's all, stop editing! Happy publishing. */
Above that line, paste the following code snippet:
define( 'WP_MEMORY_LIMIT', '512M' );It should look like this:
...
define( 'WP_DEBUG', false );

define( 'WP_MEMORY_LIMIT', '512M' );

/* That's all, stop editing! Happy publishing. */
...
If you want to be extra safe and ensure the backend admin area also has enough power, you can add this second line right below it:
define( 'WP_MAX_MEMORY_LIMIT', '512M' );Step 4: Save and Verify
Click Save Changes and close the file.
Now, go back to your WordPress Dashboard.
- Navigate to Elementor > System Info.
- Look for the WordPress Environment section.
- Check the Memory Limit row.
It should now read 512M.
Still Not Working?
If you edited the file but the memory limit hasn’t changed, your web host might be hard-locking the limit on the server level.
- Check PHP Version: Ensure you are running PHP 8.0 or 8.1. Elementor struggles with older PHP versions.
- Contact Support: Open a ticket with your hosting provider and ask them: “Please increase my PHP Memory Limit to 512MB.”
Conclusion
The “white screen of death” or infinite loading loop is frustrating, but it’s almost always a resource issue. By increasing your memory limit in wp-config.php, you not only fix the loading error but often make your entire backend experience faster.